

This children’s craft is a fun project that would be the perfect extension after reading the book, An Advent of Hope by Madeleine Carroll. (See my previous post, ‘Tis the Season of Waiting) I call this a “DIYK” craft because it is a Do-It-Yourself-Kid creation! 🙂 Children can make this Advent wreath with little assistance as long as the surface areas are covered to protect the work area from any paint. I have instructed pre-K through 1st grade students in making these wreaths, and I am sure older children would enjoy making them just as much, adding their own individual flair!

You will need:
- A small package of Crayola Model Magic clay (either green, blue and yellow to mix, or white)
- Non-toxic, washable, green Tempera paint or green food coloring (only needed if using white Crayola Model Magic)
- glitter
- a white, tealight candle
- birthday candles (3 purple and 1 pink /or/ 4 white that can be colored purple (3) and pink (1) with markers
Make sure to cover all surfaces and also to have a plate or tray over which to work and let the project dry.
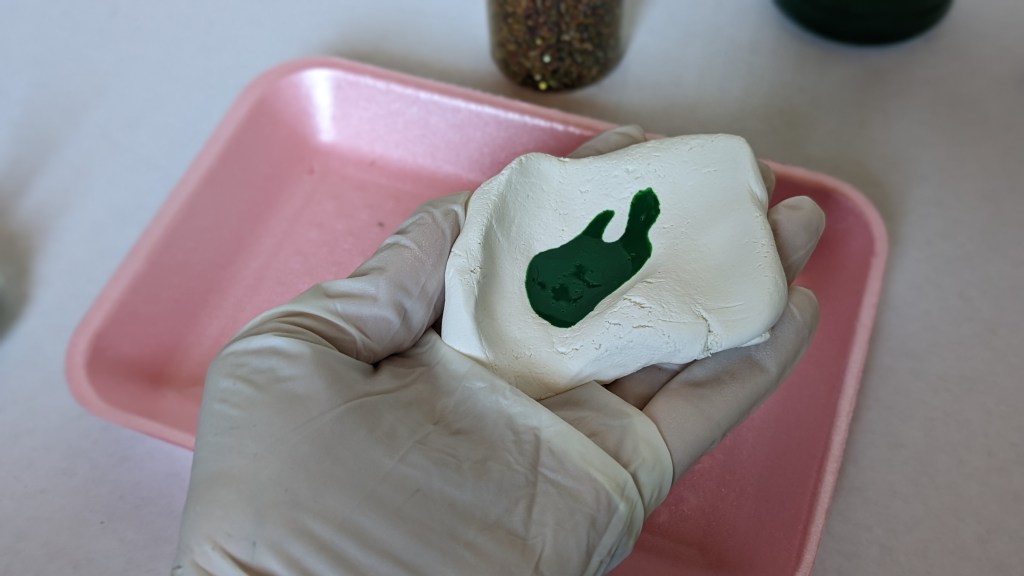
- Soften the clay using your hands. If using green Crayola Model Magic, skip to Step 3.
- If using white Crayola Model Magic, add a small amount of green paint or food coloring to the center of the clay and work it in. You may have to add more paint, a little at a time to get it the color you would like. I was satisfied when the clay became a soft pastel green. If using blue and yellow Crayola Model Magic, mix half a small amount of each color together until you have a fist-sized green ball.

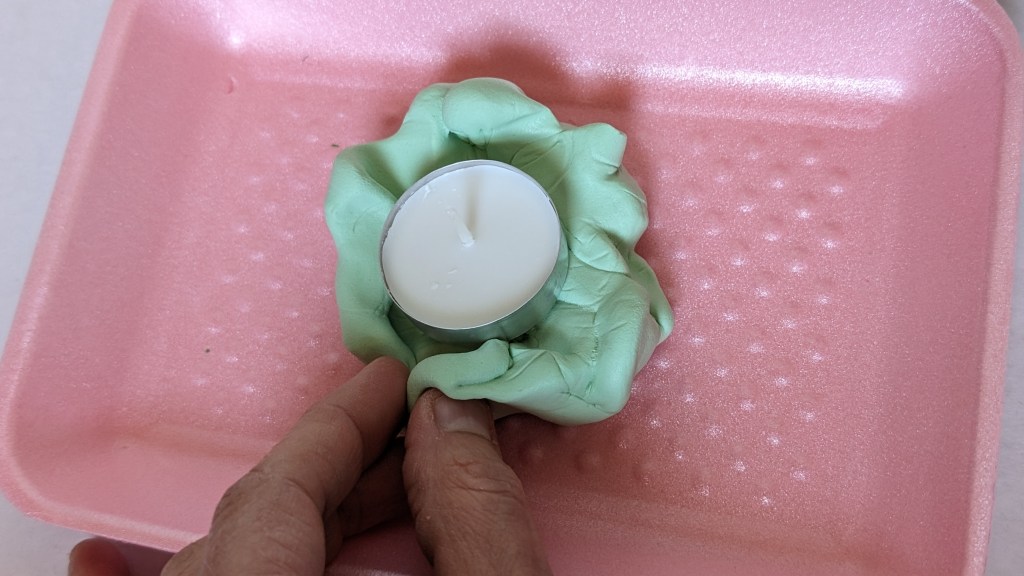
3. Form the clay around the tealight making a few lumps here and there to represent leaves and give the wreath texture. There needs to be enough clay around the sides of the tealight in which to stick the birthday candles.
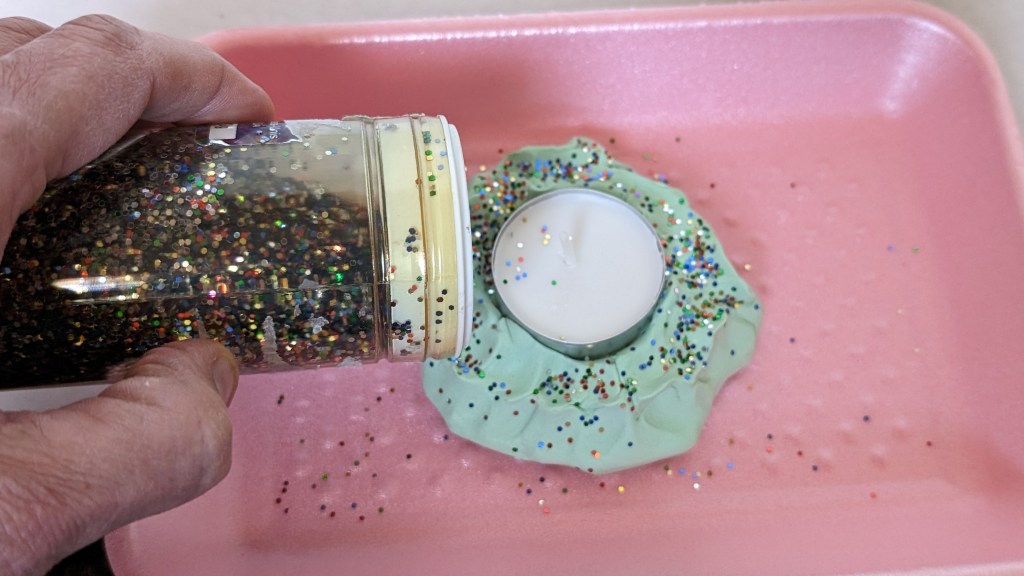
4. Add glitter to the clay around the tealight.
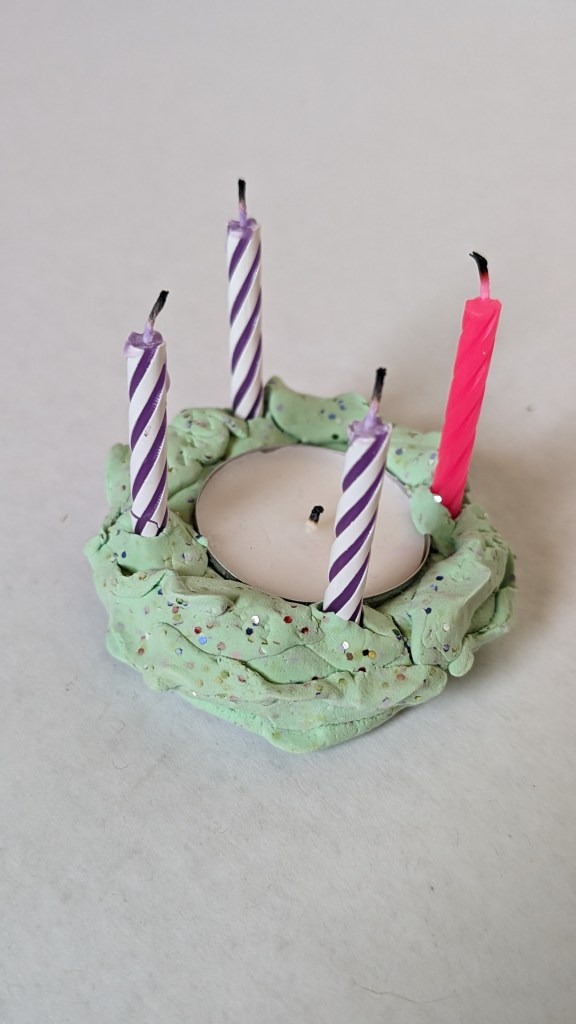
5. Finally, add the birthday candles around the outside of the wreath. If you are using white birthday candles, have your child use markers to color one candle pink and three candles purple. Non-washable markers will work best for getting the color to adhere. (Because I was doing this craft with classes, I was able to buy packs of purple and pink birthday candles at a party store, and they probably have them on Amazon too; white birthday candles colored with markers are an option too because they are sometimes easier to find.)

6. Make sure the wreath isn’t pushed into the plate/tray and let dry for 24-36 hours. Voila! A DIYK personal Advent wreath. Make sure your children know that the candles of the wreath should be only be lit by an adult.

I hope your children enjoyed making this Advent craft! Older children could change up the glitter, add small sequins, and even use acrylic paint for foliage on the wreath once it dries. When my students made these wreaths one year, one of the children said, “It looks like a little birthday wreath!” Out of the mouth of babes; it was a birthday wreath for The King of Kings!
A birthday wreath for The King of Kings!
